Mixing the color into your acrylic stucco bucket is a pretty straightforward process, but there are a few things that you should do in order to get the most uniform color out of every bucket. These are the steps for mixing color into your acrylic stucco finish:
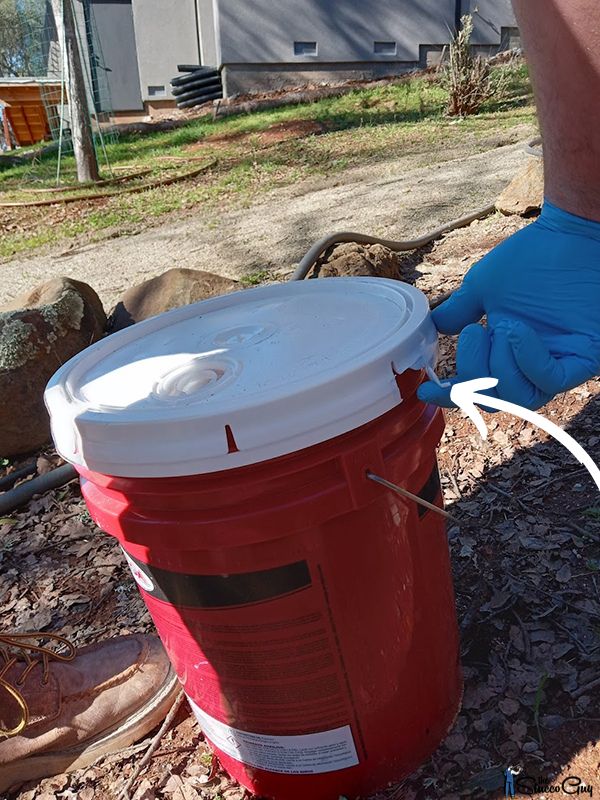
1. Removing the Lid: Begin by locating the tab on the lid of the acrylic bucket. Give the plastic tab a good pull outward, breaking the plastic connection on one side. This is easier if you have gloves on because it requires a bit of effort to break the connection, in some cases.

Before attempting to open the lid, you will need to pull this retainer off of the bucket and set it aside.

Then, carefully pry the tabs around the perimeter of the lid outward and up, making sure you do this to all the tabs all the way around the lid. Once loosened, lift and remove the lid from the bucket, setting it aside so you can use it later.

A Quick Tip:
If the edges have dried acrylic material on them, then you should scrape them off with a trowel or a float to remove them from the bucket. You don't want these mixed in the finish because they could show up in the finished texture of the wall, after it dries. The image shows the inside of a fairly clean bucket edge.

2. Preparing the Color Bottle: Before adding the color bottle to the bucket of acrylic stucco, it's essential to ensure that it is well-mixed. Make sure that the lid of the color bottle is tightly secured to avoid leaking. Then, shake the bottle vigorously for 15 to 30 seconds and the goal is to mix any settled pigments together, in order to achieve a consistent color within the color bottle itself.

3. Adding the Color Bottle to the Acrylic Stucco: Carefully open the color bottle and pour the entire bottle into the acrylic stucco bucket, making sure that all of the colorant makes it into the bucket.

4. Rinsing the Color Bottle: Fill the now-empty color bottle with half of the recommended amount of clean water, adhering to the recommended maximum water that the manufacturer recommends using. Secure the cap back on the bottle and give it a good 15-second shake to capture any residual colorant. Pour this colored water into the bucket and again, make sure all the color makes its way into the bucket.

A Quick Tip:
All stucco manufacturers will usually have a predetermined amount of water they recommend using when rinsing out the color from their color bottles. I usually like to use half that stated amount and do two rinses, to get as much color out of the bottle as possible.
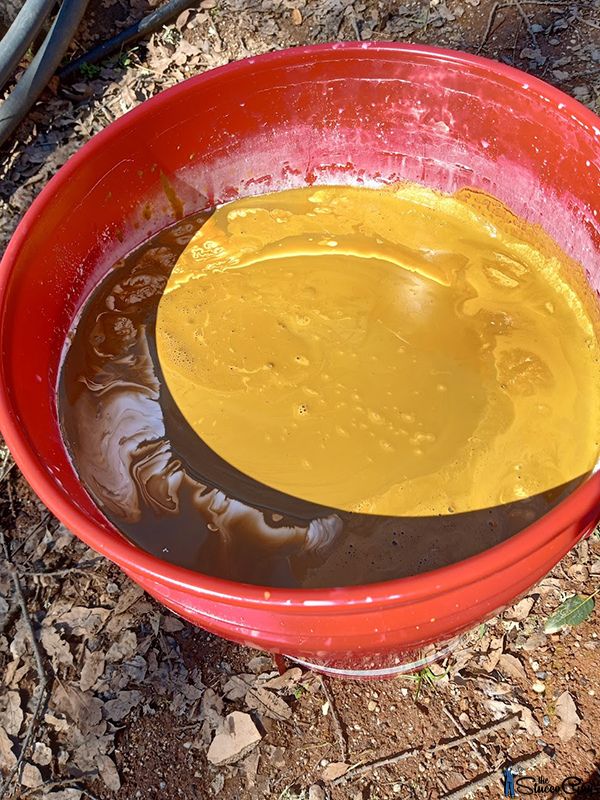
5. Ensuring Complete Color Transfer: Repeat the rinse process described in Step 4 with the remaining half of the recommended water. This step ensures that every last drop of pigment is transferred from the color bottle to your acrylic stucco, maximizing the intensity and consistency of the color. You will be left with the pigments sitting on top of the finish material.

6. Mixing the Color into the Acrylic Mix: Equip your drill with a mixing paddle, and begin to carefully mix the color into the acrylic stucco base. Remember to take it slow and try to keep the pigment inside the bucket to maintain color consistency. This is especially important when the color is sitting on top of the base material.

A Quick Tip:
When mixing up the material, move your paddle around the bucket to get every area mixed together, but avoid cutting into the bucket sides and introducing small plastic pieces into the mix. You will also want to mix the bottom of the bucket well, as this is where unmixed finish will tend to be if not thoroughly mixed.
7. Achieving a Uniform Color: Continue to mix until you're confident that the color has been fully incorporated into the stucco base, which will generally take between 2 to 4 minutes. Watch for a consistent color throughout the bucket as you mix, with no streaks or areas of raw acrylic or color showing through.
After it is mixed, put the lid back on to prevent any foreign materials from accidentally falling into the mix.

8. Clean Paddle: The last step is to clean off your mixing paddle when you are done mixing all the buckets you are going to need for that day. It is much easier to clean the paddle when the material is fresh.


