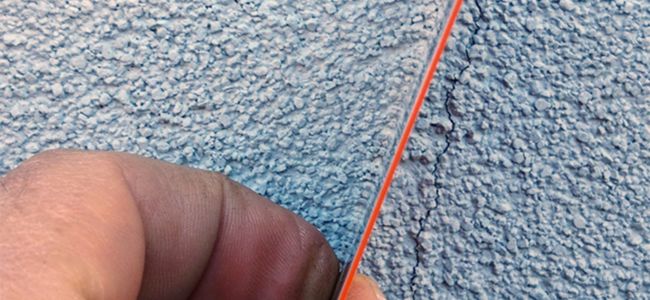
There is a saying out there that goes…. “There are two types of stucco houses, one that is cracked and ones that are going to”. Cracking is inevitable when it comes to stucco, just like any type of cement based product. Expansion, wind and stress all play vital roles in why cracking occurs.
It is normal for plaster to crack from movement and stress, especially in a new home that has not had the time to settle into it's final resting position. The wood dries, expansion and contraction occurs, the vibrations from the construction equipment around the area and other factors play a significant role in this, especially for a brand-new home.
Other issues that cause cracking issues in plaster can be brought on by improper installation of lath, improper mixing procedures and a couple of other variables.
There are certain patterns that will allow you to identify what actually caused the wall to crack. Let's take a look at some of the different types of crack to get a better understanding of why they occur.
Hairline Cracks:
Hairline cracks are typically around a 1/16 of an inch wide or smaller, if the crack is bigger than that, then chances are that some other element is the culprit. Below are some examples of some hairline cracks that have occurred.
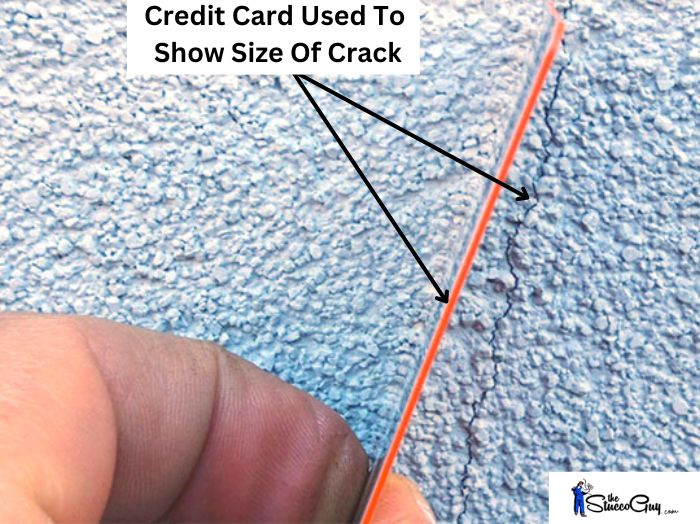
How To Repair These: These types of cracks can usually be repaired using a caulking of some sort and are fairly easy for the do-it-yourselfer. Just squeeze some caulking in the cracks and wipe off the excess and you should be good to go. I have a more in depth tutorial on repairing hairline cracks if you are interested in knowing more.
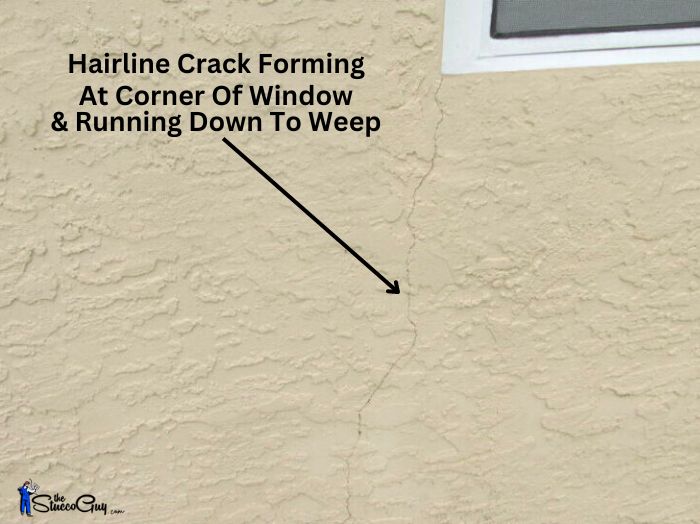
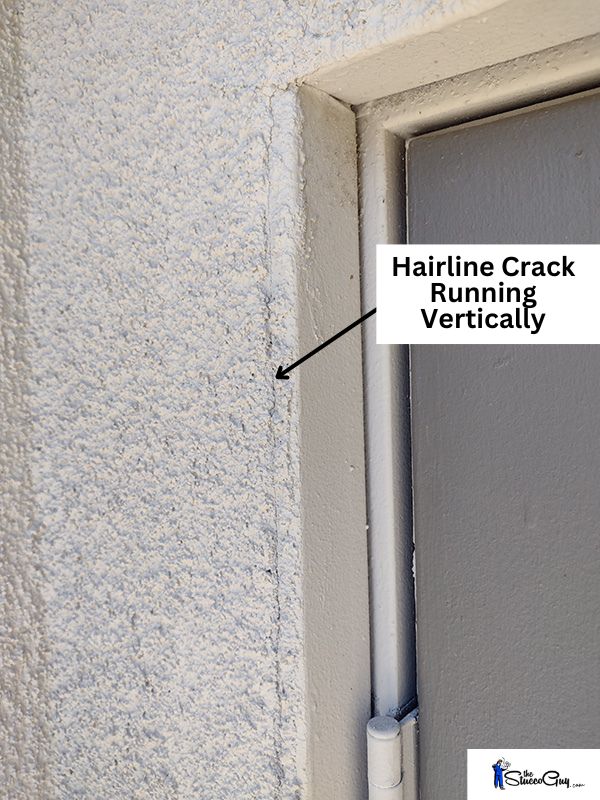
A lot of times, these types of hairline cracks form at the corners of windows and doors, which makes sense because when you open and close the window or door, it creates a lot of movement and a lot of the time this is why these cracks form right at the corners.
They usually can travel quite a way until they hit a stopping point like weep screed or an expansion joint of some sort.
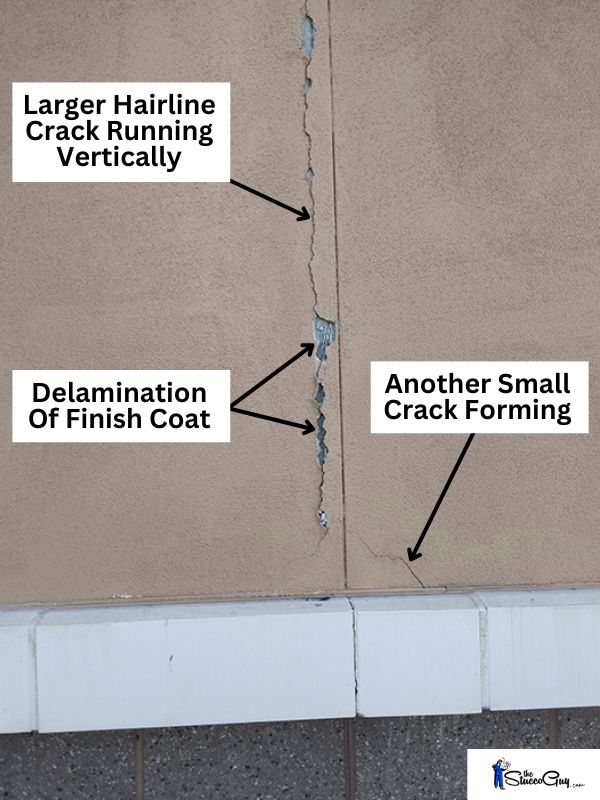
Larger Hairline Cracking With Delamination Issues
Cracks & Holes In Foam Trim Too?
I see a lot of cracks on the foam trim that is used on stucco houses quite often and most of the time it is where two pieces of trim meet. The cause is usually because fiberglass mesh tape was not used on the seam where the two pieces met.
If installed like this, it will likely crack over time due to expansion and contraction that is brought on by the fluctuation in daily temperatures.
How These Are Typically Installed: You would typically hang the foam trim and then apply a piece of mesh tape over the seam, apply a thin layer of polymer modified cement to the area and then apply a finish coat over the top of that.
An Example of How To Fix 2 Foam Issues: Sometimes, there will be a chunk missing out of the trim because they are essentially made out of EPS foam on the inside, which is very delicate. The image below shows a good example of this where the larger area would have to be filled with foam or caulking and then the crack would have to be caulked or mesh taped and then a finish coat (or two) applied over that.
A lot of times if you have foam trim around your garage doors, these will usually get hit or damaged in some way and is a very common repair we typically see due to the soft nature of this material.
What About Spider Cracking?
This type of cracking is basically a sign that the base coat did not cure properly or has been compromised in some way. This can be caused by many different things including: the base coat(s) drying too quickly, too much water in the mix, the material was mixed incorrectly or the material was applied when the temperature was too cold or too hot outside.
Water can also weaken the base coat after years of intrusion and make it soft and more likely to crack like this and can even show through the finish coat, especially if it is a cement based finish.
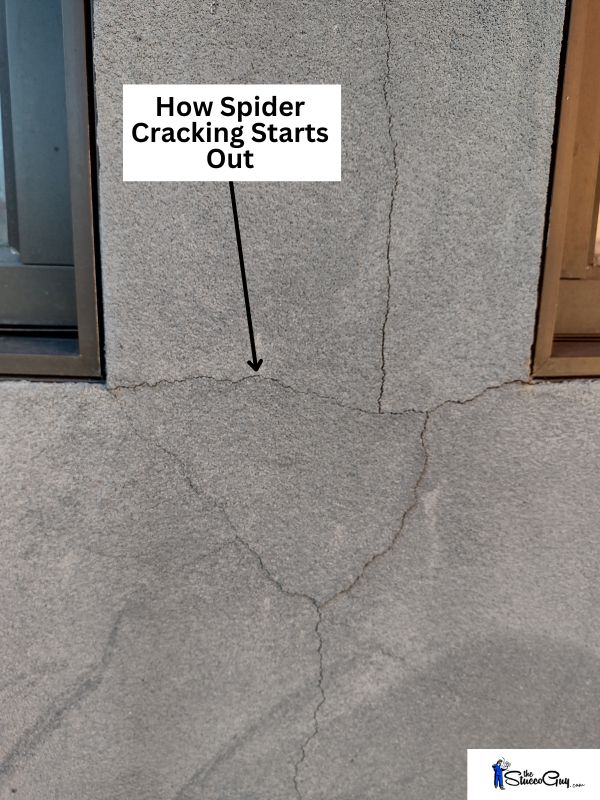
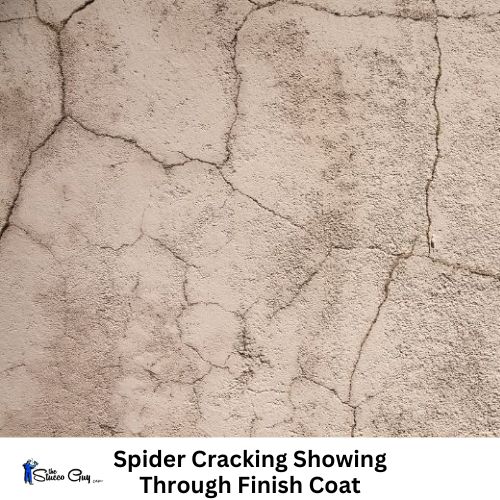
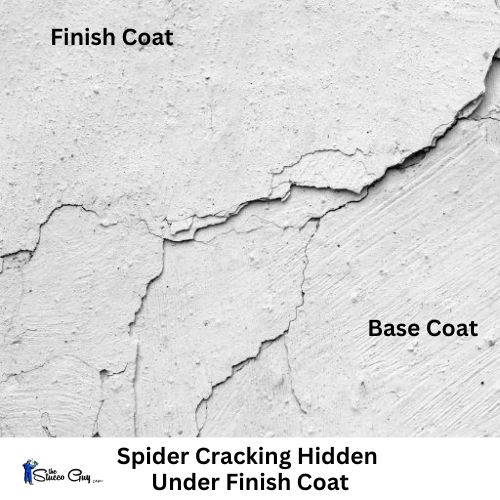
Important Note: You will want to cautiously repair spider crack issues on your stucco walls. What I mean by that is that you will need to make sure that there is no damage underneath the base coats, which can be hard to do without removing some stucco in select areas.
Most of the time, spider cracking is not really an issue underneath of the stucco itself, it was some sort of issue with the base coat. If water has been getting in for a long time, damage to the paper underneath could be a real possibility.
How To Fix These: The remedy to fix these types of cracks would usually be to mesh over the entire area and apply a skim coat, or you can even try to get away with applying a finish coat on top of the mesh, in order to eliminate these cracks from reappearing over the newly finished surface.
* This is okay to do as long as you know that the water resistive barrier underneath is fine and undamaged.
More Severe Cracking Issues:
There are cases where there are more severe cracking issues that can happen and I would classify these, personally, as being three-sixteenths of an inch or larger and the larger they are, the more serious the issue likely is.
These larger cracks are usually a result of something moving or shifting on the structure itself, making large cracks appear.
I have even seen these larger cracks appear between two dissimilar materials and will still form larger cracks due to the different expansion and contraction rates of the two materials, which really boils down to movement.
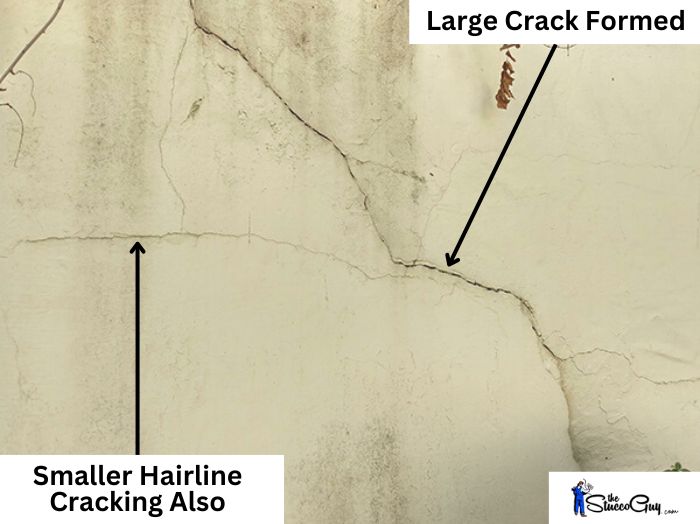
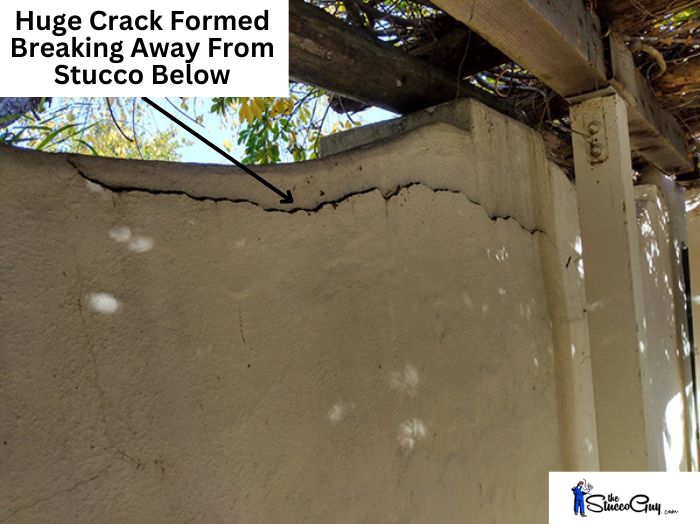
I would really recommend two different routes for repairing these types of cracks and the size of the crack, in terms of width, is going to be a major factor and how I would tackle the repair.
Smaller Cracks: Do some investigating to see if you can find any shifting or movement anywhere first before repairing the areas. This will eliminate the cracks from reappearing in the future.
For cracks that are smaller, I would grind the crack out, blow out the excess dust, apply a polyurethane caulking and then when the material was dry, apply texture to the remaining area of the crack using an acrylic product of some sort.
Larger Cracks: If the cracks are half an inch or larger (very severe), then I would really recommend that you remove a little stucco and take a look at the footings, framing and roof of your structure around that area to see if you notice anything. You would essentially be trying to find some type of clue to a larger issue that may be taking place. You would then have to patch the stucco area or areas where you removed material.
Patterns In The Wall:
Patterns may appear on rare occasions and can be a sign of what is causing the problem. These cracks will usually be straighter than normal and will usually have 90 degree patterns to them, either vertically or horizontally.
Sheathing Issues: For example, I have seen vertical cracks appear on a wall that were very straight and followed a definitive path and were spaced out every four feet. The problem was that the OSB that was underneath the stucco got wet somehow and expanded and formed vertical cracks every four feet, which is the width of a full sheet of this material!
Inadequate Overlapping Of Wire In Lath: When there are defining vertical and/or horizontal cracking occurring throughout the wall that appear in longer, straight runs, then more than likely it is caused by the lath.
Either the lath (the wire specifically) was not nailed or stapled off properly or the overlap was not adequate where two pieces of the lath met, which can be a more serious kind of cracking to remedy, as far as fixing it goes due to the time aspect that is involved.
Because the wire is essentially loose in some spots or not overlapped enough, then it will actually have a higher potential for forming even more cracks as time goes on.
Dissimilar Materials: Cracks will also often form where two dissimilar materials meet and cause a fairly straight line cracking issue where these two materials meet up.
One example of this is when no weep screed was used in a wall and the crack formed where the bottom plate of the wall and the concrete foundation meet, causing a fairly straight horizontal crack to appear.
The area between where a wooden framed wall and concrete or cinder block wall meet is also a common area where these types of cracks will form and will cause either a vertical or horizontal crack to appear, depending on how the two materials are joined.
Options For Fixing These: To correct the problem the correct way, the stucco has to be broken out and the lath has to be modified somehow. This can include things like: the lath having to be nailed off, more wire added to joint lines or replaced, or it has to be modified altogether, adding a transition piece of metal like a control joint, weep screed, plaster stop, etc.
You could try applying caulking to these cracks, if they are hairline cracks.
Diagonal Type Cracking:
Sometimes you will see a diagonal type pattern that will signify some other type of issue. Theses are usually in the general categories of seismic movements, house settling or shifting, etc.
The ones that tend to develop around a door or window are the cause the framing in the door or window or due to vibrations in that particular area, which I already touched on.
Some are more serious than others, usually a good rule of thumb is the size and depth of the crack. If it is more than 3/16 of an inch wide, then it should be a bit higher on your priority list than smaller ones and you should investigate the cause.
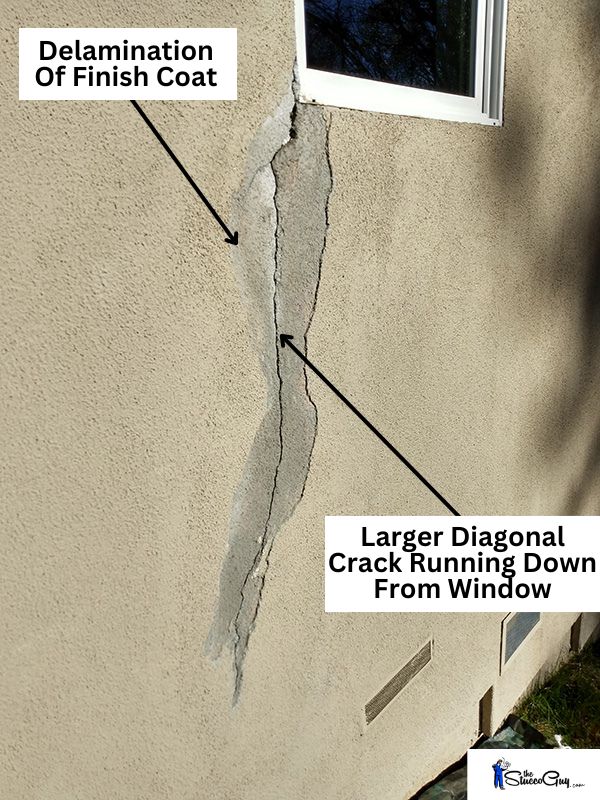
A Foundation Settlement Crack

