How To Install One Coat Stucco Weep Screed

Weep screed allows the water that gets behind the finish and base coats of stucco to drain out through holes, this is a major component in how stucco functions. Installing it is very simple and requires basic tools and knowledge. Here is a few pointers to get you started in the right direction.

Tools Needed:


Cutting Corners:

In order to join two pieces of weep at the corner of a wall, you will want to cut 45 degree angles at an outside or inside angle, depending on which type of corner you are up against. There are a couple of ways to cut corners but I want to keep it simple and minimize confusion, so I chose to go this route.

The process is the same for both inside and outside corners, the angles that you end up cutting are just mirrored. You would cut an outside corner with a normal 45 degree angle and an inside one with a 45 degree angle going the opposite way.

Inside Corners:

Step 1:

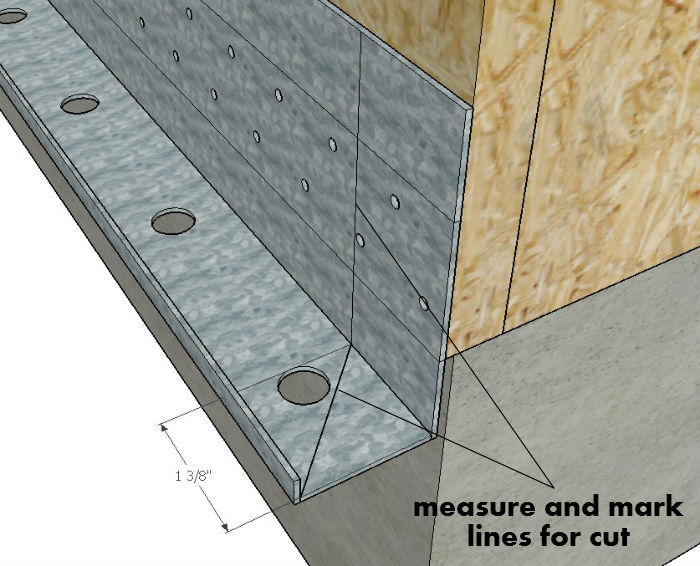
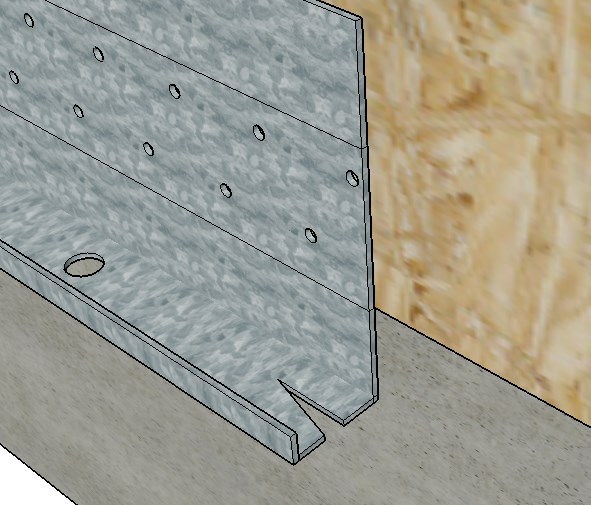
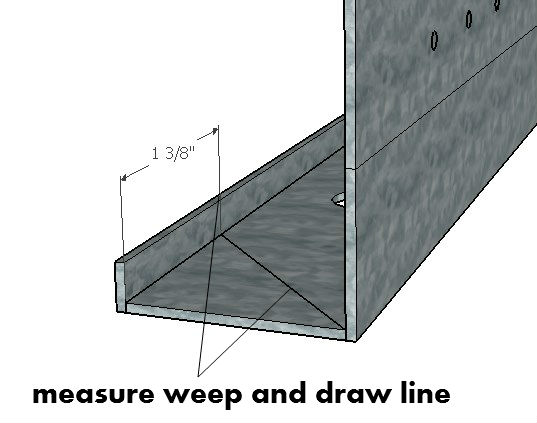
Take a measurement of 1 3/8″ along the front lip of the weep screed and make a mark. From this mark, make a line to the back flange at a 45 degree angle like the picture shows.

Measure Weep To Cut

Step 2:

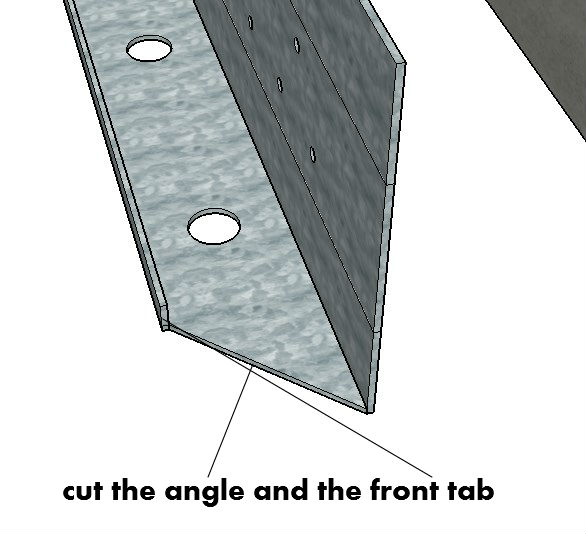
First, cut the small lip in the front straight down and then continue cutting the line you made, along that 45 degree angle.

Cut The Angle For Inside Corner

Step 3:

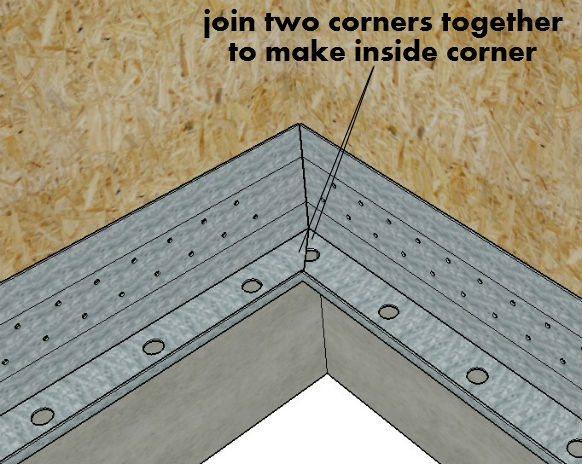
Do this same process on an opposite end of weep screed, so you have two 45 degree angles that align perfectly like this:

Finished Inside Corner

Outside Corners:

Step 1:

This time you are going to make a mark on the back flange at 1 3/8″ and draw a 45 degree angle going the opposite way, for your outside corner.

Make Mark For Outside Corner

Step 2:

Cut the line you made, the back flange straight up from your line and the small lip on the front.

Cut Lines To Make An Outside Corner

Step 3:

I showed you how to do one side of the weep for an outside corner, now you just need to do the same thing on another piece of weep screed (on an opposite end) and you have a completed outside corner.

Two Pieces Of Weep Screed Joined To Make An Outside Corner

Where Two Pieces Of Weep Meet Up:

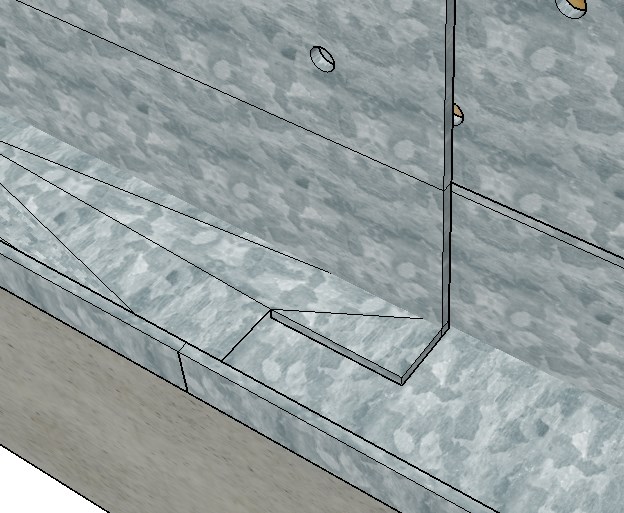
​Joining two pieces of weep screed together is a part of the installation process. The recommended overlap should be a minimum of 1″.

Step 1:

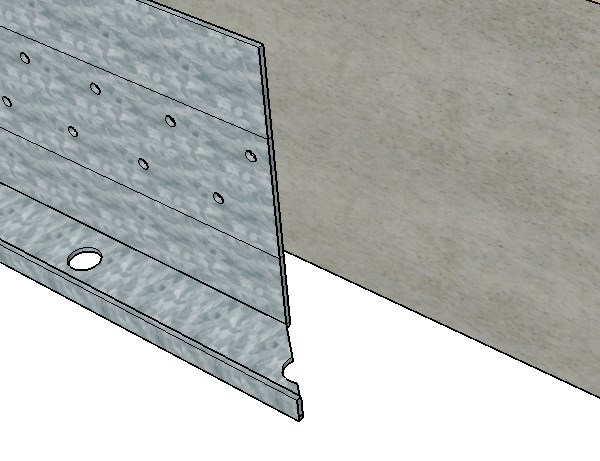
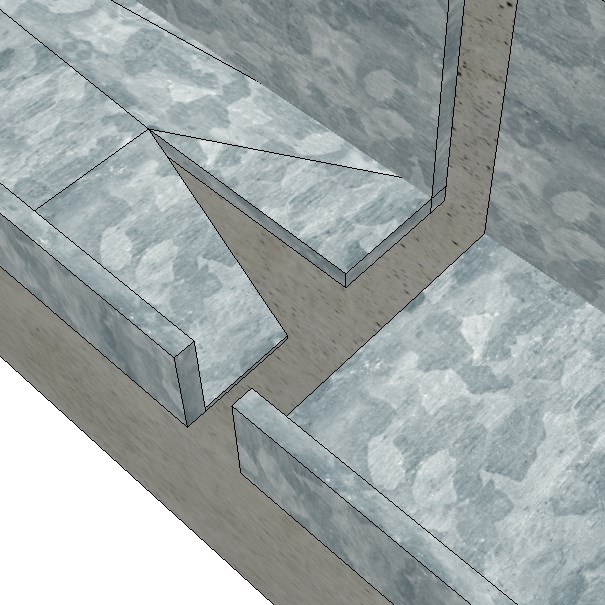
To join two pieces of weep screed together, cut a notch in the new piece in a “V” shape like the picture illustrates. Then the new piece can slide over the existing one.

Cut V Notch In Weep

Step 2:

The two pieces will slide together easier if you bend the front lip of the weep screed down just a little bit, which usually happens automatically once you cut the “V” out.

Now, it’s just a matter of sliding the new piece into the existing piece.

Slide Two Pieces Of Weep Screed Together
Finished Overlap Look

Installation Process:

​The installation process is fairly simple and goes pretty quick. Start at an outside corner and work your way around the building.

Step 1:

Typically, you would start at an outside corner (like I mentioned) and work your way around the building.

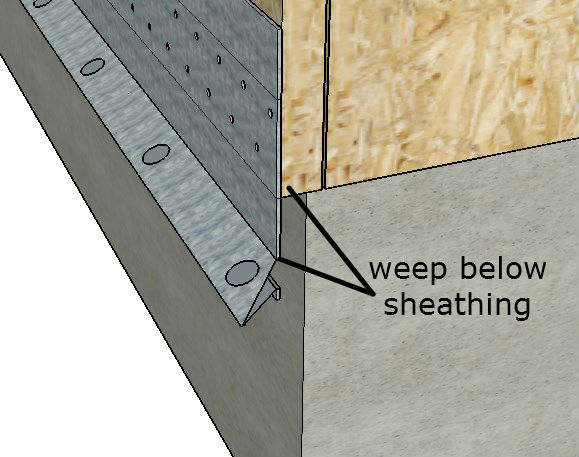
So start off by cutting an outside corner like I described earlier and make sure the bottom of the weep is roughly 1″ below the sheathing.

Make Sure Weep Is Below Sheathing

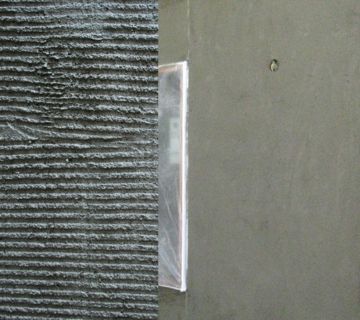
​I would recommend having someone help you with this because it is very difficult to do alone, mainly because the pieces are 10′ in length. The picture shows a different type of weep screed but the process is the same.

Step 2:

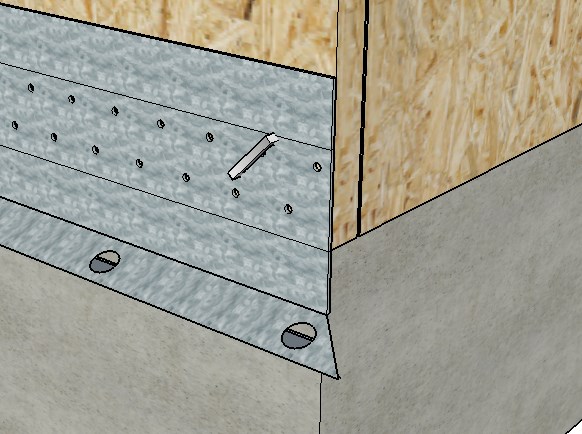
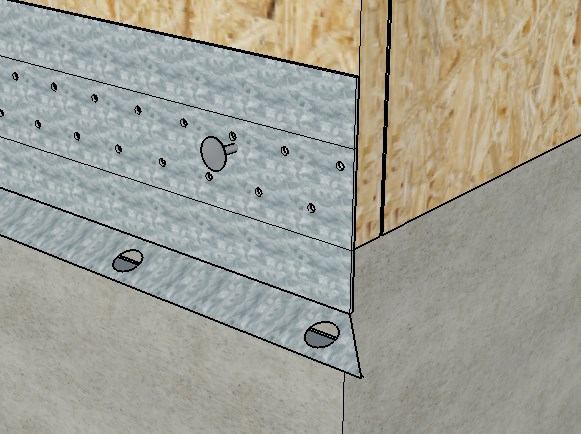
With the weep in place on the corner, either nail or staple the weep in the top corner as shown ​in the picture below. Notice where the staple and nail is located, the upper middle area of the weep screed flange. 

Staple The Weep Screed
Nail The Weep Screed

Step 3:

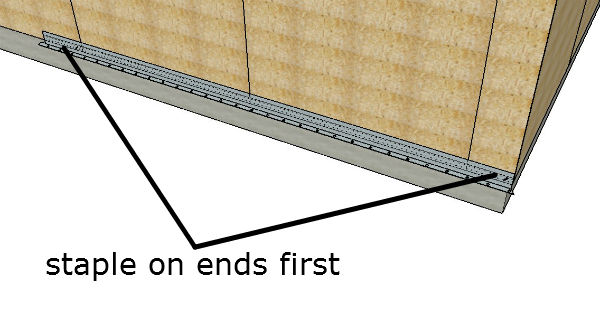
After you have the first corner nailed/stapled, then you’ll want to put another one in the far end, making sure the weep is hanging down an inch like the other side. Then use a nailing pattern like the picture illustrates to finish it off.

Staple On Either End
About Me Image
About the Author

The Stucco Guy

Ryan Retired Stucco Contractor

I’m Ryan, a longtime stucco contractor who has spent plenty of years getting dusty, chasing cracks, matching finishes, and figuring out what actually works in the real world. I created TheStuccoGuy.com to make stucco a little less confusing, help homeowners avoid expensive mistakes, and give you practical answers without all the fluff.

Take a look around, and if something still has you scratching your head, send me a question. I’m always happy to help.

Leave a Comment:

8 comments
Bruce Benson says

Hi Ryan, can I do one-coat stucco over concrete, the exterior face of a concrete stem wall being the concrete I’m thinking of putting the one-coat system over?

Reply
    The Stucco Guy says

    Hi Bruce, great question! You can apply a one-coat stucco system over a concrete surface like a stem wall, but it’s important to ensure the surface is clean, dry, and free of any dust or debris. It might also be beneficial to use a pressure washer if it has been exposed to the elements for any amount of time. Good luck with your project!

    Reply
Robert L Zeis says

Hi Ryan, I am going to lath for stucco using one coat 3/8 base then color coat. Im going to use 1 inch thick foam. Do I just install foam against the #7 FHA weep screed and leave angled gap below or do I chamfer the bottom of the foam to fit against the angled kick out?. Thanks

Reply
    The Stucco Guy says

    Hello Robert, typically a “J” shaped weep screed is used for one coat stucco systems, which eliminates the need to chamfer the bottom edges of your foam. If you still plan on using the #7 weep screed, I would chamfer the bottom and make sure it has that 1 3/8″ ground depth you need!

    Reply
Patrick C McDaid says

Good article! At the end of your article you mention: “Then use a nailing pattern like the picture illustrates to finish it off.”, but the picture does not show this. Do you use the holes in the metal? And what spacing is required?

Pat

Reply
    The Stucco Guy says

    Thanks Patrick! I usually just put 4-5 nails per 10′ section of weep screed. You can use the holes if you want, but you could nail through the flange anywhere.

    Reply
Dan Myers says

Hi Ryan,
Thank you for the valuable information you share on your website. I was looking for a solution to a problem I have that others may have encountered too. I have an upper level tile terrace with a raised cap on the wall. The vertical wall off the terrace is stucco. There are now black stains on the stucco at every grout join on the tile cap run for the length of the wall. The tile does not overhang the stucco nor is there a “skreed” on the top of the stucco either. We are considering a redo of the tile with an angle back to the terrace instead of its current level position. But your opinions would be very welcome. How should we construct the top of the stucco wall to prevent this? Thank a million,
…dan…

Reply
    The Stucco Guy says

    Hey Dan! Any overhang you can add would be great! It would protect the stucco so much better and help to keep it cleaner, as well.

    Reply
Add Your Reply