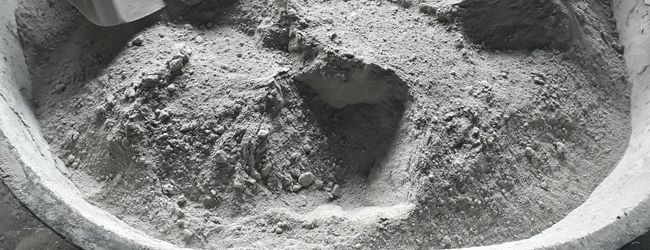
There is a lot of confusion when it comes to mixing any kind of stucco, but we will be discussing the base coat mix in this article.
I will use a custom recipe that will work for most applications and include how to mix in a bucket, wheel barrow and a mixer, which all require a little different techniques.
At the end of the article, I will post other custom recipes, in case you want to use one of those instead, but the basics for mixing them will be the same.
Three Mixing Methods:
Either A Barrel Mixer Or A Mortar Mixer: There are two different types of mixers, one that spins (typically for concrete) and one that has paddles that mix the cement (called a paddle or mortar mixer).
Typically, a mortar mixer will be used because it mixes up the base coat really well because of the paddles, which whip the mud around. These can not handle rocks though, so using them for concrete is out of the question.

A Mortar Mixer
The barrel type mixers can be found at home improvement stores but the selection is pretty limited to non existent, from my experience.
I was surprised to find a decent number of these online that were decent quality and a fair price. Just be sure to try and get a larger one that can handle a good amount of material at once.
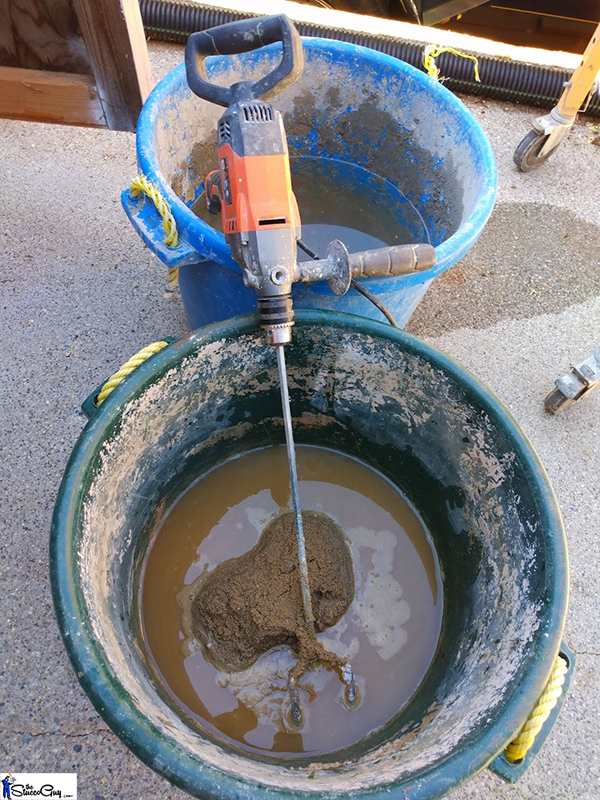
A Bucket, Paddle And A Drill: This method is better for smaller applications and uses a 5 gallon bucket (or larger container) and a special mixing drill with a mixing attachment.
These can mix up just about any type of stucco mix out there from base coats, to finish coats and even tile grout, concrete and epoxies. It is very versatile and way less money than one of the mixers listed above.
If you are planning on getting one yourself, be sure to look online first because the selection is much better and the pricing is fair too.

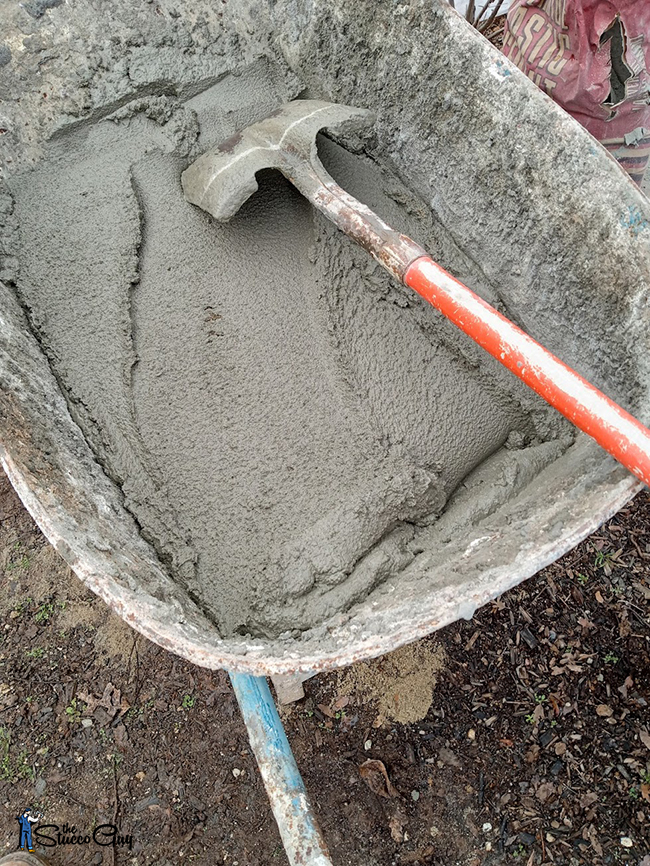
A Wheelbarrow And Hoe: This is pretty self explanatory and works very well, try to use a mason’s hoe if possible (has two holes in the metal).
You can use a shovel or a standard hoe, if you would like but is going to be a little bit tougher and take a bit more time.
A larger wheelbarrow (6 cu. ft.) will work better for mixing and be less likely to tip over in the process.

The Stucco Mix Formula I Use:
There are so many different formulas out there that you could use and I will post other ones at the end of this post, but for this example, I am going to use a formula that I have used for years and that works well for me.
- One Part Plastic Cement
- Three Parts Masonry Sand
- Water
- Additives can be used too (acrylic, fiberglass, etc.), depending on what type of project I am working on
Basically, the “parts” can be measured in a container (like a gallon container) or weighed out to equal the given formula (3 to 1 ratio).
For example, if I used a gallon container for measuring, I would fill it with Plastic Cement (1 part), 3 times with masonry sand (3 parts) and then add water accordingly.
- Water: There is no rule to the amount you should add, but add it slowly until the consistency of pudding is reached.
If your sand is wet when you mix, then much less water will be needed, so there is no specific amount to utilize.
As a test, after the stucco is mixed, take a trowel and dip it into the mix, gathering a baseball-sized amount. Tilt your trowel sideways and if it falls off before reaching a 40-degree angle, then it is probably too wet.
- Sand: I chose masonry sand because it is somewhat fine and washed, this combination has made the “brown coat” float off really nice and compacts nicely.
You can chose sand with a little bit larger aggregate (sand particles), but I wouldn’t go too big, especially for smoother finishes, because it will telegraph through and make the work on the finish coat much harder. - Cement: Plastic cement is what I like to use because it has a little more “workability” to it than just standard Portland cement does. It spreads easier and is more forgiving on the muscles, and will not require you to add any lime to it.
You may use Portland cement if you would like, it doesn’t make any difference, just be sure to add lime if using Portland cement, or it will "go off" way too fast and be REALLY hard to spread.
Here is a few different recipes that I pulled up from jlconline.com and are from The Northwest Walls & Ceilings Bureau (A trusted stucco association):
5 Different Base Coat Recipes!
How To Mix The Base Coat In A Wheelbarrow:
This is one of the most basic ways to mix stucco and does a moderately good job, providing you mixed for an adequate amount of time and added the ingredients in a specific order.
Just be sure that you have all the proper tools ahead of time and make a clean and organized work station. No power is needed and for smaller projects, this is a great method.

Items needed:
- A hoe for mixing: it can have the holes in it or not, it is just easier if you use the kind that has the holes in the metal blade, because that is what it is designed for.
- A wheel barrow: preferably a large sturdy one, like the blue contractors wheelbarrows that you can find at most large home improvement stores.
They are sturdy and deep and are really the best choice for mixing stucco, I have tried many different wheelbarrows myself and really recommend the larger ones. - A water hose: be sure that you have a nozzle attached, so it is ready to use and available whenever you need it
- And materials: this can be sand and cement or a base coat that has the cement and sand mixed together for you already
The Mixing Process:
(For this example, we will be using a custom mix as described above using 1 part plastic cement (94 lb. bags) to 3 parts sand (100 lb. bags).)
Add a little bit of water to your wheelbarrow (roughly 2 gallons to start) and throw in one bag of sand. Mix with a hoe and add water if needed. Next, add the bag of cement (plastic or Portland cement) to the water and sand mix and more water, so you can actually mix everything adequately.
Then, add another bag of sand and more water. Finally, add the last bag of sand and enough water to achieve a thick, but workable consistency.
Avoid adding too much water, which can be achieved by adding only enough to be able to mix the sand and cement together, making sure that no dry material is present.
- Add water throughout the mixing process, so the mix does not get too dry and hard to mix. If it gets too dry, it will be extremely hard to mix and will take much longer to achieve the consistency you are going for.
- You can use a shovel, hoe or something similar to mix the batch, but a mixing hoe is recommended and it will make the job a lot easier, especially if you are mixing a few bags.
- Set everything you need (hose nozzle, hoe and materials) in one spot to create a “mixing station”, it will save time and increase productivity.
How To Mix With A Bucket And Drill:
Mixing in a bucket, using a mixing drill is one of my favorite ways to mix up "mud" on small to medium sized projects. If you have 1 or 2 people mixing, you can really get the material on the wall!
Organization is key to this and having a shovel or large scooper to use for measuring out your sand and cement is another huge part of the process that can make it flow or can make it extremely hard.
Think about the entire process ahead of time and what you would need to make it easier on yourself.

Items needed:
- Two 5 gallon buckets: One is essential, for mixing the stucco and another one can be used for storing and cleaning the paddle in between mixing cycles.
Consider using two or three different mixing buckets if you have a larger area to cover (100 sq. feet and up). - A mixing drill: These come in all different shapes and sizes and can be found at most home improvement stores. A 3/8″ drill will work just fine, but a 1/2″ one will do a better job and be more “up to the task”.
- A mixing paddle: You can use whatever type you like, but I prefer a rectangular shaped one myself.
- A water hose: be sure that you have a nozzle attached, so it is ready to use and available whenever you need it
- A cheap scale: to weigh materials
- And materials: this can be sand and cement or a base coat that has the cement and sand mixed together for you already
The Mixing Process:
(For this example, we will be using a custom mix as described above using 1 part plastic cement (94 lb. bags) to 3 parts sand (100 lb. bags).)
First add some water (roughly a gallon to start off) and figure out how much of each material to add using a 3 to 1 ratio of sand (3) and cement (1).
Remember that sand will weigh a lot more than cement and a good trick would be to weigh half of a five gallon bucket of sand and cement, using an old bathroom scale and see how much each weighs.
After you have figured out the weight of each material, start by adding about a third of the sand to the bucket of water and mix for a few seconds.
Then, add all of your cement and mix again. Finally, add the rest of the sand and water (if need be) to achieve a moderately thick consistency.
- Add water throughout the mixing process, so the mix does not get too dry and hard to mix. If it gets too dry, the bucket will spin and could potentially hurt you.
- Keep your feet firmly at the bottom of the bucket and squeeze your feet firmly around the bucket to avoid it from spinning.
- Mix the top portion of the bucket and work your way down, it will be much easier and allow the cement and sand to mix together quite nicely.
How To Mix In A Mixer:
Mixers are best for medium to large sized jobs and can pump out some serious square footage in one day, if you have the plasterers to match it. It is quite a workout though and will take a lot out of a novice at the end of the day or end of the project.
Be sure to exercise extreme caution around these and never stick anything in the mixer while it is operating. Turn the mixer off first (kill engine) if you have to access the inside of the machine.

A Mortar Mixer
- A Mixer: You can use either a mortar type mixer or a barrel type, either way is fine, but a mortar mixer will mix the materials much better and is the recommended way to mix the sand and cement together.
- Gas/Power Cord: Depending on what type of mixer you are using, you will need gas and/or a power cord to run the mixer. Of course, gasoline engines require gas and mixers with electric motors require a power supply.
- A water hose: be sure that you have a nozzle attached, so it is ready to use and available whenever you need it, like in the other two methods!
- A water hose: be sure that you have a nozzle attached, so it is ready to use and available whenever you need it
- And materials: this can be sand and cement or a base coat that has the cement and sand mixed together for you already, either way, it doesn’t matter. This example will use a custom mix though (sand and cement).
The Mixing Process:
(For this example, we will be using a custom mix as described above using 1 part plastic cement (94 lb. bags) to 3 parts sand and will be mixing one bag at a time.)
First add some water (roughly four gallons to start off) and figure out how much of each material to add using a 3 to 1 ratio of sand (3) and cement (1). Remember that and will weigh a lot more than cement and you will be adding shovels to the mixer, roughly 22-25 full shovels (mounded up).
Take a large shovel full of sand and place it on a scale to see how much it weighs and multiply it until it is roughly 300 lbs.
Once you have about 4 gallons of water in the mixer, add about 10-12 shovels of sand to it, be sure to add a little more water if the mix is getting stiff.
Next, add the bag of cement (94lbs.) and add water
accordingly. Finally, add the remaining sand to the mixer and add water
until a stiffer mix is achieved.
Mixing the batch a LITTLE BIT stiffer will help to mix the sand and cement around better. Let it mix for about 3-5 minutes and add little amounts of water until a desired consistency is achieved.
- If using a mortar mixer, listen to it running, if it slows down or the
rhythm of the mixer is decreasing, then you can probably add a little
water until it gets its usual sound back.
- When adding water, use a hose to spray down the sides of the mixer so
you can clean the walls off AND add water at the same time… Great idea!
- When mixing the batch a bit stiff, remember, you will only be adding 1/2 -3/4 of a gallon of water to the mix to achieve the desired consistency, so don’t make it too stiff!

