Just like everything else in the world, there comes a point in time where your stucco is in need of repair. It might be a small patch or an entire wall, it really doesn’t matter, what matters is how you intend to fix it.
Fixing Stucco Yourself:
It is possible to fix a small patch yourself, I wouldn’t recommend trying to repair an area larger than 10′ x 10′, these types of patches come with a lot more variables and can be more hassle than it’s worth for the average homeowner.
A Standard Stucco Patch (Installing A New "?" In Existing Stucco):
A standard stucco patch, in my eyes is for something that you want to install on a wall like a dryer vent, hose bib, electrical box, etc. These are probably the easiest patches to do and will take the least amount of skill and time to tackle. These are relatively small in size and will require minimal tools.
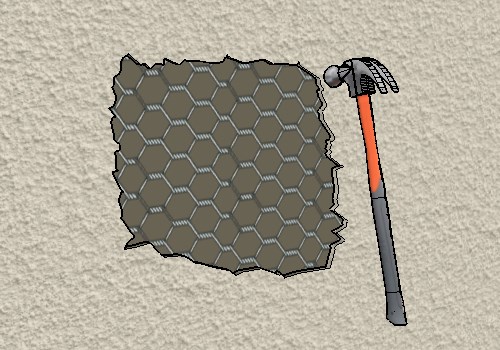
Step 1: Take a hammer and gently hammer away at the area where you are going to do the patch. You want to keep the paper and wire in good shape so you will be able to tie into it later.
The area around the patch should be inconsistent, you want to avoid straight lines, they will show evidence of a patch, so the rougher, the better.
Step 2: This is the step where you would install anything you needed to install, like a hose bib, dryer vent, etc. For this example we will use a dryer vent to better illustrate the process. Trace the outline of the dryer vent that will go into the wall, so you have a reference line.
A pencil will work for this but will be difficult to see on the black paper so you could use a whiteout pen instead, if you would like but it is not that necessary, just a tip really.
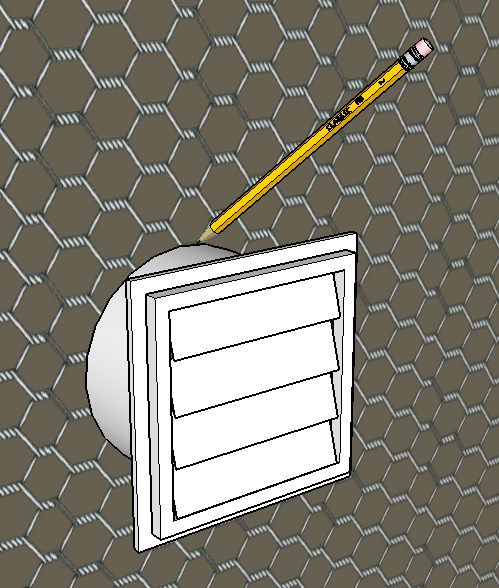
Step 3: The next step is to cut the wire, using your line as a reference point. Aviation snips are best for this and I would recommend a "center cutting" pair.
If you need to cut more or less wire, for some reason, then go ahead and do so and remember the fact that is much easier to cut out more wire later if you have to but adding wire will take much more time. 🙂
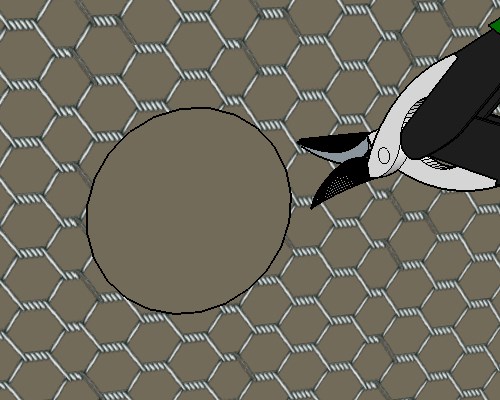
Step 4: Install the dryer vent (or whatever else you need to install) according to the manufacturer's recommendations.
I don't want to get into the details of installing the dryer vent, just be sure to use a quality caulk (like a polyurethane) to seal the gap where the paper and fixture meet.
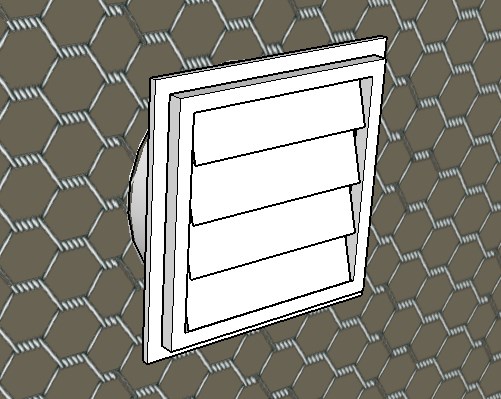
Note: The fixture should be held off the wall the correct amount of distance, to allow for the installation of the stucco. Three coat stucco is about 7/8" thick and a one coat (a.k.a. two coat) stucco system is roughly 1 3/8" thick.
The Lathing Process (One Coat & Three Coat Systems):
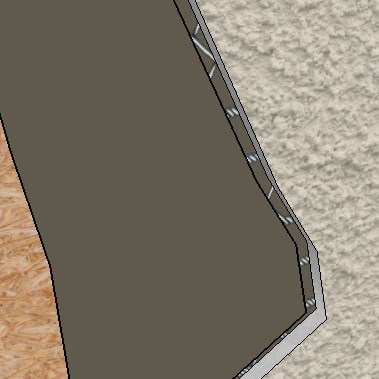
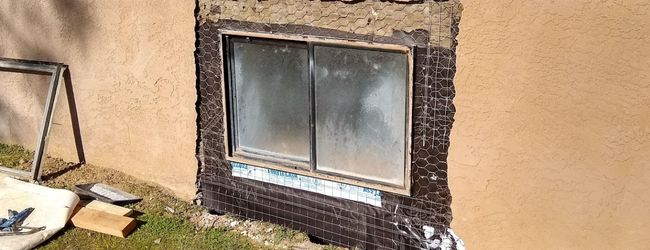
After Breaking Out The Stucco: After you have the demolition portion of the project completed, you will be left with something like this:
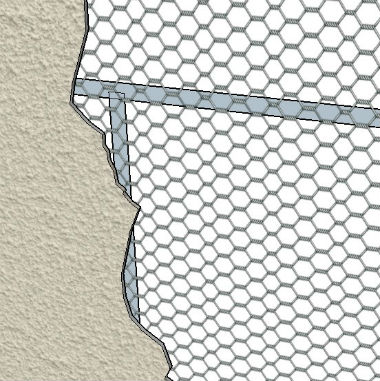
One Coat Stucco System: You will be left with white foam and 20 gauge wire on top of that. Tape is used on the foam at the seams, usually vertically and sometimes horizontally. The wire will be stapled on, more than likely.
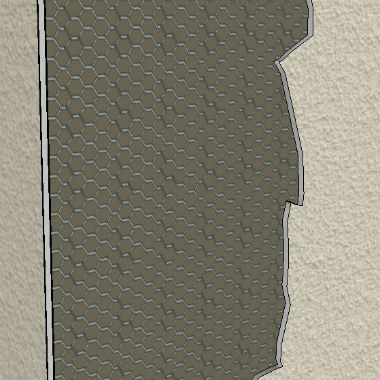
Three Coat System: You will just see two ply black paper (sometimes only one ply was used) and 17 gauge wire. The wire is usually stapled on (newer buildings) or nailed on.
Cut The Wire: The next step is to cut the wire from the existing stucco, leaving about 6" or more to tie into. This will create a stronger bond and reduce the chances of cracking.
This method is the same for a one coat stucco system, you would see white foam and wire instead of black paper and wire but the technique and process is the same.
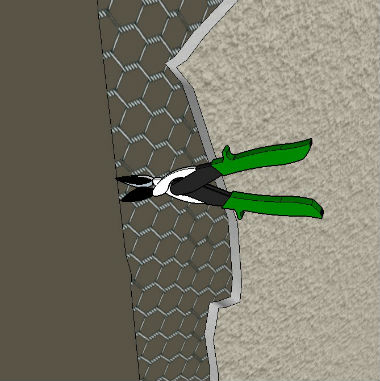
All About The Scratch Coat:
Mix up some "mud" for applying a scratch coat. I have written a post on some stucco base recipes that will help with ratios, how to mix, etc.
After you have the mix ready, go ahead and start applying it with a hawk and trowel or by throwing some "mud" on the wall and then troweling it out.
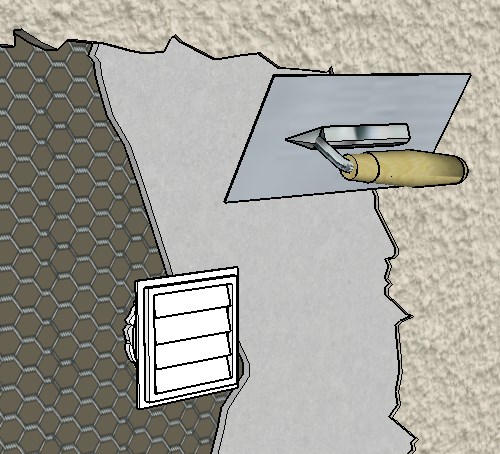
Be sure to spread the scratch and brown coats in two separate coats. The scratch coat should fill about half the total thickness of the patch and the brown coat will fill the other half of the patch. You can use a trowel or a red float for applying the scratch coat, I personally like a red float because I can spread the material into the edges of the existing stucco much better because it has a little flex to it.
After you have covered the wire completely with stucco material, you need to use a scratcher or scarifier to make lines in the wet cement so the next coat can adhere better.
Horizontal lines work best and you should try to go left or right (or visa versa) whenever possible. You can have vertical lines but only when you have to do so and there is no other option. Not a huge deal but horizontal lines are better!
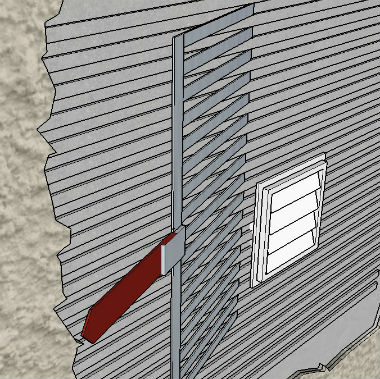
Applying The Brown Coat On Stucco Patches:
Once the scratch coat is cured enough (usually 48 hours for standard base coat mix, not Rapidset materials) you can apply the next coat, also called the brown coat.
The picture shows the brown coat flush with the existing finished wall. We will have to put a finish coat on this (that matches) and will float out the edges later, so just go flush to the finish for now.
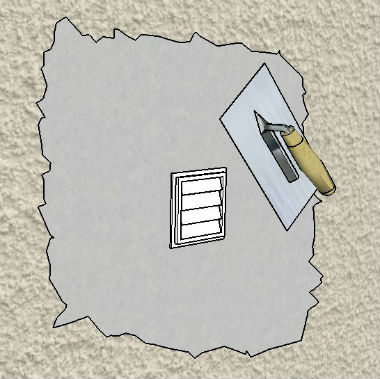
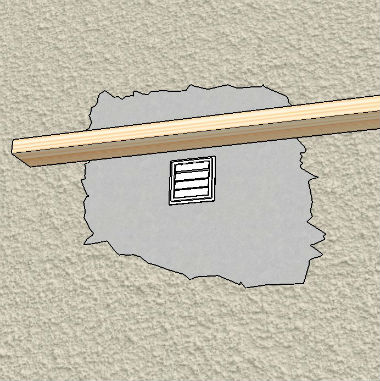
Using A Screed: Having something that will span the entire patch will get everything filled properly and evenly, so use a 2x4 piece of wood, a long trowel or anything else that would span the entire patch.
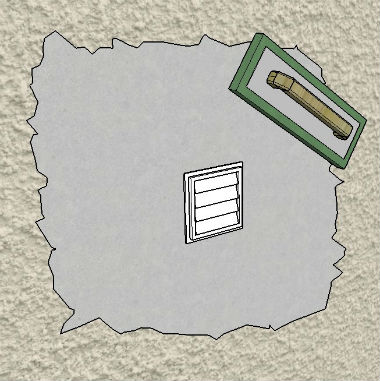
Floating The Brown Coat: Give the "mud" a little time to set. You can check this by touching the cement with light pressure until your finger prints will not show. This is a skill in it's own but basically you don't want to wait too long or float too soon.
You can use a hard rubber float to float the finish or a green float (shown in the picture) depending on which material you used. A green float will work better on Rapidset patch materials and a hard rubber float will work better on a standard stucco base coat.
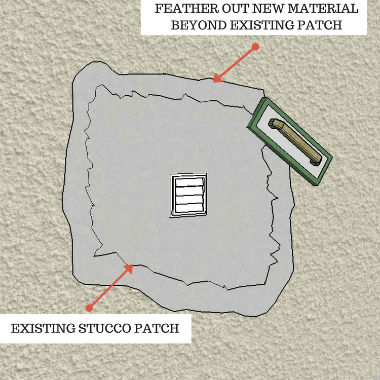
Feathering In The Edges: You will want to feather in the edges of the new material PAST the edges of the existing patch, as illustrated in the picture on the right.
Be sure that you do not leave a ridge, you want it thick where the patch is and thin around the edges. Think paper thin (around the edges of the patch) and you will be in the ballpark of having the proper thickness.
Applying Different Textures On The Finish Coat(s):
Apply the finish coat after the brown coat has cured properly. This can be 2-4 weeks for small patches using a traditional type of base coat material and sooner using a Rapidset product. Stick to the manufacturer's recommendations when in doubt.
Note: I didn't want to write about one specific finish because it would only help a small amount of people. Instead, I wanted to make an entire post about how to achieve MANY different stucco finishes, which I am currently working on and will have it completed ASAP!
Replacing A Window/Door With A Stucco Exterior:
Coming Soon!
Removing A Door Or Window On A Stucco Wall:
Coming Soon!
Removing A Door Or Window On A Stucco Wall:
Coming Soon!
- Step 2: Remove any nails or staples that remain, but keep the paper in tact as much as you can. You want to keep about 6″ of paper and wire around the area to tie in the new paper and wire. You can always use expanded metal lath, which has a tighter, smaller mesh pattern to it and would only have to overlap the wire about 2-3 inches instead of 6".
- Step 3: Cut a new piece of paper the size of the patch and staple it to the wall. Use only as many staples as you have to, the fewer, the better and make sure you tuck the paper in at the top and overlap it at the bottom. Water will flow down the wall, so you want it to run down the paper and not get behind it, look at the paper and determine if it will repel water properly.
- Step 4: Caulk staples and areas the the paper is not overlapping enough (usually at the bottom of the patch, where the new and old pieces meet).
- Step 5: Cut the wire and nail it on where the studs are and around the patch, try not to nail through the plywood, if possible. Caulk all nail heads or staples and let dry for a few hours.
- Step 6: Apply the mud at a thickness of 3/8″ and score the mud with a notched trowel or a “scratcher”. This is a base coat for your next coat, so it will need to be rough to promote proper adhesion. Let the mud cure for a day or two, watering it twice a day, in the morning and evening to make sure it properly cures.
- Step 7: A second coat is applied and should be flush with the existing stucco. Let it dry a little and then GENTLY scrape the patch to get an even, uniform pattern. Using a hard rubber float, pack the surface using circular motions and swirling the still workable patch. Be sure the patch is a little (1/16″-1/8″) indented, meaning it should not be flush with the existing stucco. You want to allow the top coat to blend in properly, so make sure you do not fill the patch too full of mud. Let the cement cure for at least 7-10 days, watering it twice a day for three consecutive days.
- Step 8: Apply a finish coat and match your existing texture on the area. Feather out the edges and make sure there are no lumpy spots that will stand out when it dries. Let the top coat dry for a week before painting. That’s it!
This is a brief overview of how to do your own stucco repair yourself. It is pretty simple and requires minimal tools.
A Few Things To Avoid & Watch Out For:
What To Avoid: The picture on the right shows how stucco is removed sometimes because it is easier and faster, for most people.
The only problem is that there is no wire exposed (from the existing stucco) that the patch can tie into and the edges are straight, which will make the patch more visible after the patch work is done.
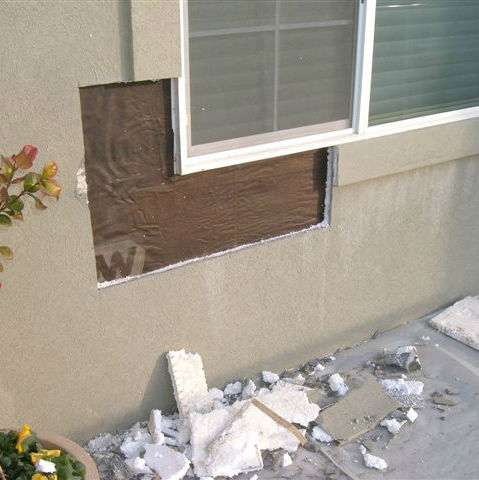
What To Avoid: The picture on the right shows wire that was cut back too far and is not nearly enough to tie into. You want at least 6" of wire to overlap the new wire.
If you are having problems with the wire (rusty and keeps breaking) then try breaking out a little more stucco until you find good wire. Sometimes you will have to just stop and use what you have, if the wire is in really poor shape or mawke a decision to demo that entire wall and install all new paper and wire.
